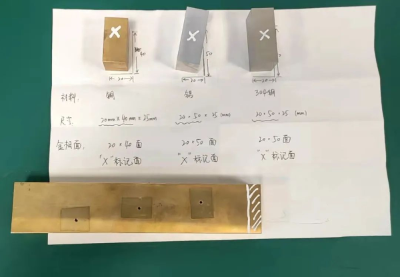

Cutting
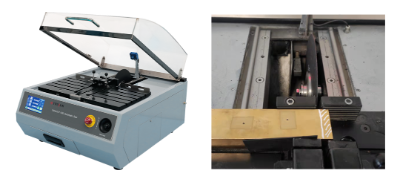
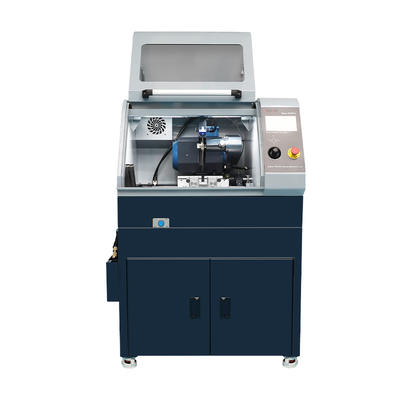
Use the TableCUT-200 automatic precision cutting machine to cut the square copper rod sample, cut into 2 samples, one of which is parallel to the length direction of the copper rod (that is, the longitudinal direction), and one is perpendicular to the length direction of the rod (that is, the transverse direction).
|
Equipment |
TableCUT-200 Automatic precision cut-off machine |
|
Consumables |
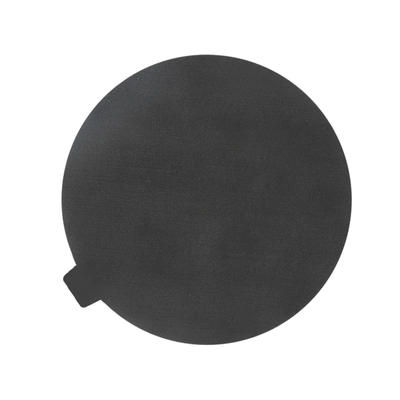
A60Si Ccutting disc(200*22*0.8mm) |
|
Parameter |
3000rpm,0.1mm/s |
Grinding
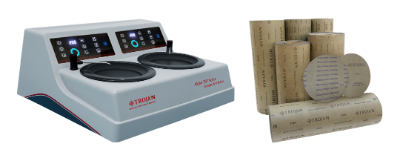
Use Alpha-202 Double Wheels Grinder&Polisher to grind the sample, sandpaper P180→P2500. Since the materials of the three samples provided are relatively soft, light force should be used in the grinding process.
|
Equipment |
Alpha-202 Double Wheels Grinder&Polisher |
|
Consumables |
Abrasive paper:P180;P400;P800;P1200;P2000;P2500 |
|
Parameter |
300rpm |
Polishing
Polishing of 304 stainless steel
Polish the sample with Alpha-202 Double Wheels Grinder&Polisher,Use YS polishing cloth and 1μm polycrystalline diamond suspension for rough polishing;Then use ET polishing cloth with 50nm silica polishing liquid for fine polishing.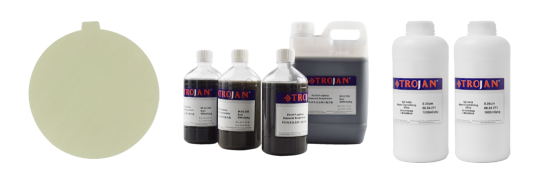
|
Equipment |
Alpha-202 Double Wheels Grinder&Polisher |
|
Consumables |
YS polishing cloth,1μm polycrystalline diamond suspension |
|
Parameter |
YS:500rpm,3~5min |
Polishing for Aluminum alloy
Polish the sample with Alpha-202 Double Wheels Grinder&Polisher,Use YS polishing cloth with 3μm→1μm polycrystalline diamond suspension for rough polishing; Then use ET polishing cloth with 50nm silica polishing liquid for fine polishing. It should be pointed out that the surface of aluminum is easy to blacken during polishing, so polishing lubricant should be added during rough polishing.
|
Equipment |
Alpha-202 Double Wheels Grinder&Polisher |
|
Consumables |
YS polishing cloth,1μm polycrystalline diamond suspension |
|
Parameter |
YS:500rpm,5~10min |
Polishing for Copper Alloys
Polish the sample with Alpha-202 Double Wheels Grinder&Polisher,Use YS polishing cloth and 1μm polycrystalline diamond suspension for rough polishing;Then use ET polishing cloth with 50nm silica polishing liquid for fine polishing. 25% ammonia water and 3% hydrogen peroxide should be added to the silicon dioxide polishing solution.

|
Equipment |
Alpha-202 Double Wheels Grinder&Polisher |
|
Consumables |
YS polishing cloth,1μm polycrystalline diamond suspension |
|
Parameter |
YS:500rpm,5~8min |
corrosion
After checking the polished surface and confirming that there are no sample preparation defects such as scratches and trailing tails, corrode the sample to observe its metallographic structure. Corrosion should use the abrasion method, observe while corroding, and stop corrosion immediately when the surface of the sample is observed to become foggy and dark.
|
Material |
Corrosive solution |
|
304 Stainless steel |
perchloride iron:5g hydrochloric acid:50ml water:100ml |
|
aluminium alloy |
Kroll 's reagent hydrofluoric acid:1~3ml nitric acid:2~6ml water:100ml |
|
copper alloy |
ferric chloride:3g hydrochloric acid:2ml Ethanol absolute:96ml |
|
Note 1: Due to the limitation of our company's conditions (no hydrofluoric acid), the reagents used to corrode aluminum alloys are actually used to corrode titanium alloys, but it is still feasible from the effect point of view. Note 2: 304 stainless steel is slightly polished after corrosion to remove the black film on the grain surface. |
|
Observation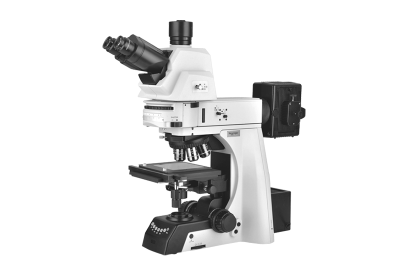
|
Equipment |
MN 60 Series Microscopes |
|
Consumables |
|
|
Parameter |
50×→500× |
Analysis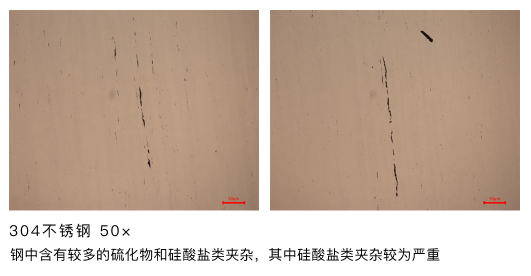
304 stainless steel 50X
The steel contains more sulfide and silicate inclusions, of which silicate inclusions are more serious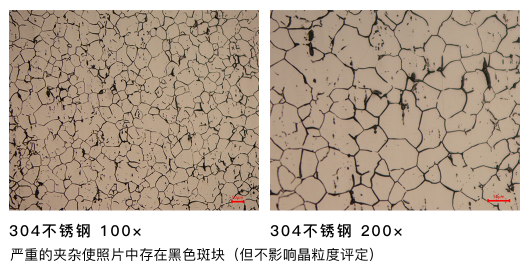
304 stainless steel 100X 304 stainless steel 200X
Severe inclusions cause black patches in photographs (but do not affect grain size assessment)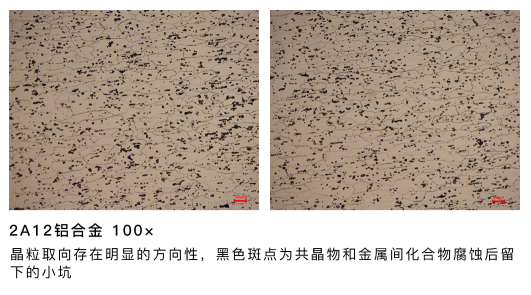
2A12 aluminum alloy 100X
There is obvious directionality in the grain orientation, and the black spots are small pits left after the eutectic and intermetallic compounds are corroded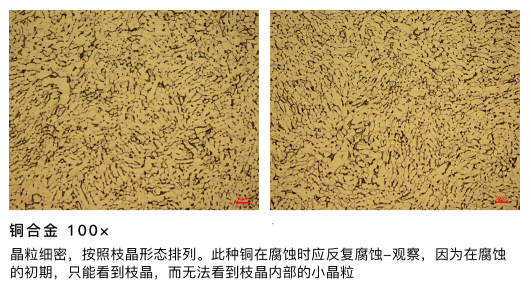
Copper Alloy 100X
The grains are fine and dense, arranged according to the dendrite morphology. This kind of copper should be corroded repeatedly during corrosion-observation, because in the initial stage of corrosion, only the dendrites can be seen, the small grains inside the dendrites cannot be seen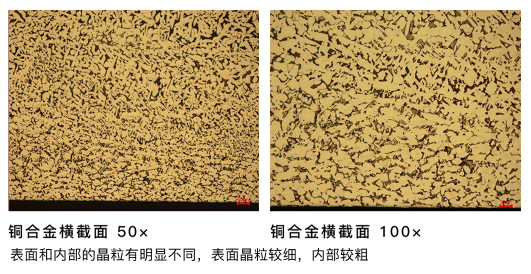
Copper alloy cross section 50X Copper alloy cross section 100X
The surface and internal grains are obviously different, the surface grains are finer, and the internal grains are coarser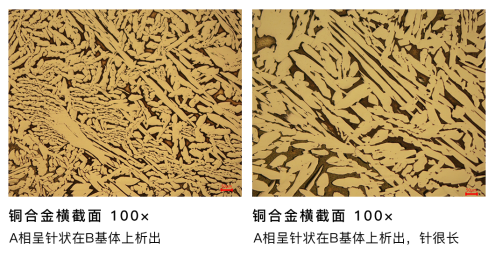
Copper alloy cross section 50X Copper alloy cross section 100X
A phase is precipitated on the B matrix in the form of needles
A phase is precipitated on the B matrix in the form of needles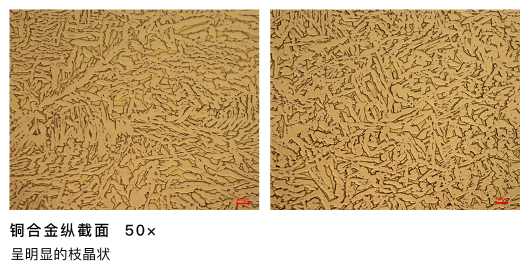
Copper alloy longitudinal section 50X
Apparent dendritic shape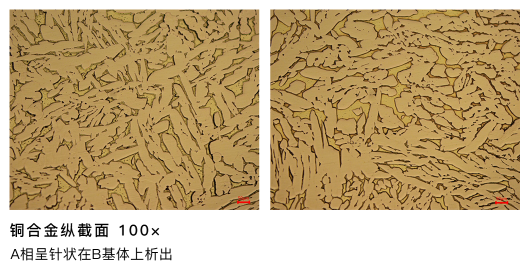
Copper alloy longitudinal section 50X
A phase is precipitated on the B matrix in the form of needles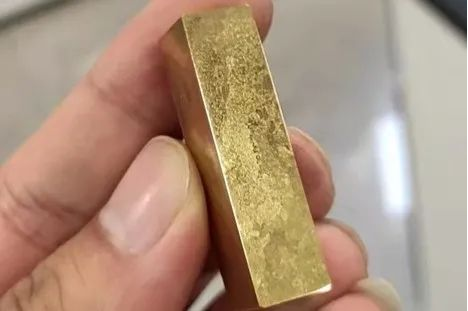
In the longitudinal section, it can be clearly seen that different crystal planes refract light with uneven brightness and darkness
Very coarse protodendritic regions seen under a stereomicroscope
Using the straight line intercept method in GB/T6394-2017 to evaluate the average grain size of the sample, the results are as follows:
304 stainless steel average grain size: 52.2μm
Average grain size of 2A12 aluminum alloy: 71.20μm
Copper alloy average grain size: 25.87μm
Among them, the vertical and horizontal grain size protodendrites on the square copper rods are very thick, and the diameter is estimated to be about 2571 μm, which is visible to the naked eye. The average diameter of the α-phase was determined to be about 82.81 μm by the 10.4 cut-point method of the grain size of the sample containing two-phase or multi-phase structure in the 10th subsection of GB/T6394-2017.
This sample is an ultrasonic test sample, in which 304 stainless steel contains a large number of large-sized silicate inclusions; 2A12 aluminum alloy grains have directionality; There are differences in the microstructures of the two batches of copper alloy, and the surface and core microstructures of one batch are inconsistent, and the grains have a certain preferred orientation.从In terms of the rigor of the experiment, these samples can not meet the experimental requirements well. It is recommended that when purchasing samples again, the supplier must be required to provide equiaxed grain samples that have been heat-treated and have no preferred orientation. Stainless steel should not contain obvious inclusions.

 中文简体
中文简体 英语
英语 西班牙语
西班牙语 德语
德语

.png?imageView2/2/w/400/format/jpg/q/75)


.jpg?imageView2/2/w/400/format/jpg/q/75)


